It is important to have a good layout and land preparation before plantation.
Flat/Even fields
If the field is even/flat with good drainage facility plantation can be done on flat fields with deep ploughing followed by pit digging, pit filling with recommended basal application and staking.
Undulated Fields
If the field is uneven and poor in drainage the following practices needs to be implemented.
| S.N. | PRACTICES |
| 1. | Elevation Surveys |
| 2. | Deep Ploughing |
| 3. | Breaking Clods |
| 4. | Leveling & Slope |
| 5. | Drainage Trench |
| 6. | Raised Beds |
| 7. | Spacing |
| 8. | Digging Pits |
STEP 1 – ELEVATION SURVEYS
Precision contour surveys are essential in low-slope areas, while they may not be necessary in regions with a slope greater than 0.5% since the slope direction is less likely to be affected by minor elevation changes. The key reasons for conducting a precision survey include:
- Detecting the dominant slope direction.
- Identifying humps and hollows that may alter surface water flow.
- Determining the need for local drains or cross drains to remove water from small depressions.
- Planning the orientation of raised beds and identifying the best location to drain excess water from the main drainage at the lower end of the raised beds. Surveyors capable of conducting precise elevation surveys and producing maps are available locally.
STEP 2 – DEEP PLOUGHING
Deep ploughing of field is done twice with 12-18 inches deep plough.
Why deep ploughing is required?
Deep ploughing is required for two major benefits.
- It breaks the soil’s hardpan, enabling better root growth and improving water/moisture penetration.
- It exposes soil-borne pests and insects to harsh atmospheric conditions, reducing their population.
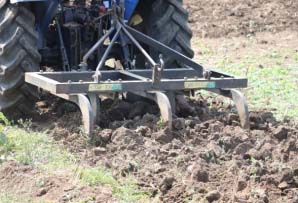
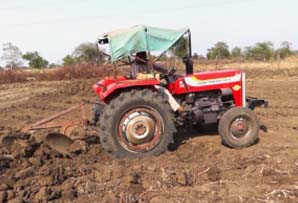
IMPLEMENTS FOR DEEP PLOUGHING
For more details click here: https://youtu.be/IsS-asWQdjE?si=SpqTx_tfvej-7jb5
STEP 3 – BREAKING CLODS
- After deep ploughing, clods of soil are broken with a rotavator.
- This is to be done few days after deep ploughing when moisture is reduced.
Benefits: This gives better texture to soil and makes it suitable for leveling & plantation.

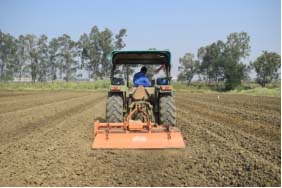
ROTAVATOR BREAKING CLODS
For more details click here: https://www.youtube.com/watch?v=8VTHz50zNK4
STEP 4 – LEVELING & SLOPE
Leveling of field is done to avoid water logging in uneven pockets & for convenience of activating agricultural practices, a slope of 0.5 % is recommended to get runoff excess water.
Benefits:
- This is made to drain out excess water minimizing soil erosion.
- Leveling of 200-250 ft long patch at a time with drainage proved to be efficient and cost effective.
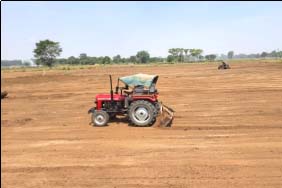
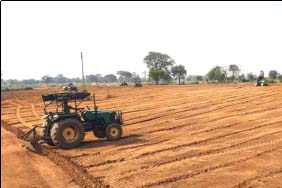
For more details click here: https://youtu.be/4lbEFb4dKiU?si=8mXg36dphED1hKrs
STEP 5 – DRAINAGE TRENCH
- After leveling the field, a main drainage trench – 2 ft deep and 2/3 ft wide is made.
Benefits
- This ensures collection & drain of excess water from the orchard area.
- This practice helps in reducing the excess moisture in the field.
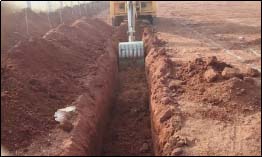
MAKING OF DRAINAGE TRENCH
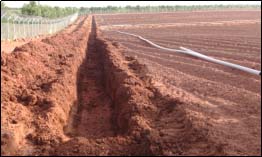
MAIN DRAINAGE TRENCH
STEP 6 – RAISED BED
What is Raised Bed?
The manually elevated/mounted soil mass at a certain height from the ground where plants are transplanted is called a Raised Bed.
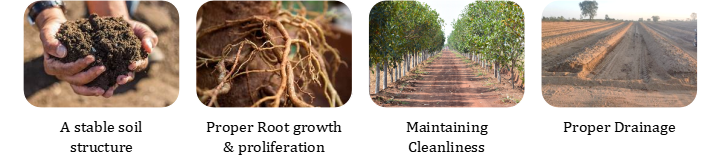
Objectives of making raised bed –
The desired outcomes from these management objectives are to ensure the Raised Beds function properly, that is, they:
- Ensures proper drainage and aeration, preventing water logging.
- Enhances root growth and proliferation, which strengthens the soil structure and increases organic matter.
- Improves water-use efficiency, ultimately increasing production.
Raised Bed need to be prepared at least 15 days before plantation.
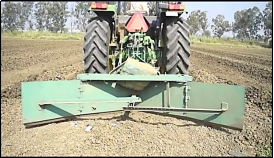
MAKING OF DRAINAGE TRENCH

MAIN DRAINAGE TRENCH
For more details click here: https://youtu.be/SsRf8fbJll0?si=w-g-IF8obOnqwUc2
Benefits
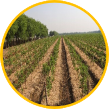
It facilitates proper drainage which, in turn, maintains optimum moisture in roots during rainfall.

It confines the root zone of the plant so that the Farmer can give water and nutrients to feeder roots

It is convenient to do mulching on raised beds which helps in reducing weed population.
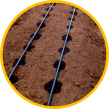
It enhances drip-laterals life and intercultural operations within plant periphery.
Bed Orientation
Orientation of raised bed in North-South direction is found best.
Reason
- The North-South orientation allows for an even exposure of the sunlight, which maximizes the chances of uniform crop development.
- Crops planted on a predominantly east-west orientation have the rows closest to the northern shoulder of the bed exposed to sunlight for most of the day. This causes greater soil evaporation from the northern shoulder and results in one or two crop rows growing less and yielding poor than the crop rows on the remainder of the bed.
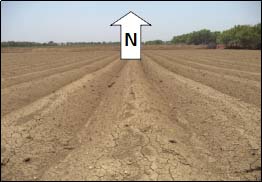
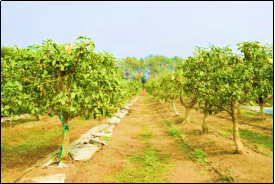
RAISED BED & PLANTATION IN NORTH – SOUTH DIRECTION
Size of Raised beds
- In waterlogged areas, raised beds are made 3 times the level of water to protect roots from excess moisture.
- Height of the Raised beds – 12-18 inches.
- Width of the Raised beds – 30-36 inches.
N.B – The size of raised beds varies in different soil types and rainfall area.
Bed Preparation
- The soil masses are drawn on a line with help of a ridger up to a required height.
- The elevated soil thus should be well finished manually after the work is completed mechanically.
- The beds should be soiled well with irrigation, so that the soil becomes compact and helps the plant for better anchorage.
STEP 7 – SPACING
Spacing refers to the distance between two fruit plants and varies from plant to plant.
Suggested spacing for Bael Orchard:
Minimum spacing –
Row to Row 15 feet
Plant to Plant 15 feet spacing found suitable for Bael
= 193 plants/ Acre
= 482 plants/Ha.
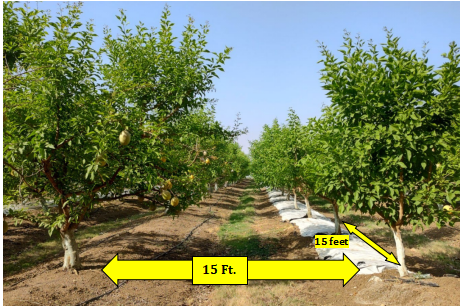
STEP 8 – DIGGING PITS
Pits are required to loosen the soil, break the hard pan and to create moisture availability for good root development and plant growth. It also helps in placement of required nutrients with well decomposed FYM.
- Pits are dug on raised beds either manually or mechanically.
- Mechanical digging is efficient and cost-effective.
1. Manual Method
Pit digging with size matrix of 2L×2W×2D ft with application of FYM and basal dosages is an essential activity before plantation of Jackfruit Plant.
Tools for pit digging:
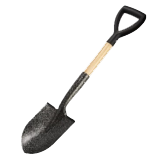
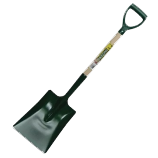
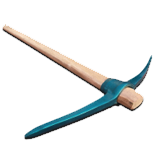
Steps to be followed for manual operation:
| S.N. | STEPS | IMAGE |
| 1. | Taking measurement of the area to be dug. |  |
| 2. | Digging pits manually. | 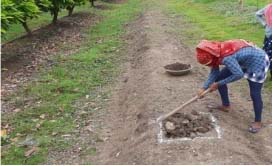 |
| 3. | Separation of top soil & bottom soil of the pit | 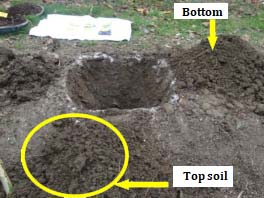 |
| 4. | Measuring pits 2 x 2 x 2 ft. | 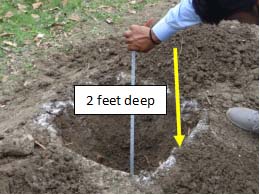 |
| 5. | Top soil mixed with 10 – 12 kg FYM placed in the bottom of the pit. | 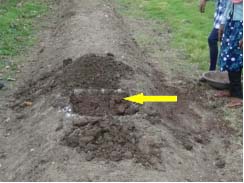 |
| 6. | Bottom soil mixed with 8 – 10 kg FYM placed in upper layer of pit. | 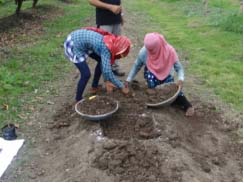 |
| 7. | Placement of Chemical Fertilizers in bottom soil to be filled in top of the pit: SSP: 40 g MgSO4: 10 g MOP: 10 g Multi Micronutrient Mixture: 5 g DAP: 5 g |  |
| 8. | Pit ready for transplant. | 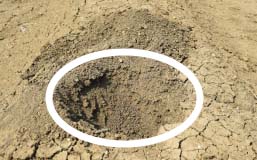 |
2. Mechanical Digging
- For this purpose, tractor mounted post-hole digger with auger diameter 20-22 inches can be used.
- Post hole digger can be sourced from Agri. Implement Shops or Contractors of Forest / Electricity Departments.
Tractor driven digger and two drivers can make 300 / 400 pits per day on the raised bed. Manually, one labour can make max. 15 – 20 pits/day (estimated).
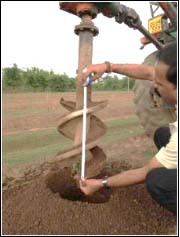
MEASURING AUGER

POST HOLE DIGGER
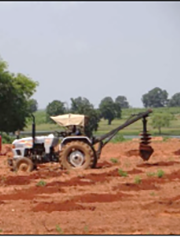
TWO POST HOLE DIGGER TO REDUCE TIME
For more details click here: https://www.youtube.com/shorts/L1zbww0d3BE
References:
• https://www.ncbi.nlm.nih.gov/pmc/articles/PMC6339770/
•https://www.researchgate.net/publication/330201154_Nutritional_and_Health_Benefits_of_Jackfruit_Artocarpus_heterophyllus_Lam_A_Review
• https://www.flipkart.com/tadso-lid-garden-tool-gaiti-kudaal-wooden-handle-heavy-duty-agricultural hovel/p/itm58f0208aef4c7 –
• https://www.scottdirect.com/tools-equipment/hand-tools/shovels-rakes/square-mouth-shovels
• https://www.jawad-alsaffar.com/store/en/all-categories/14210-sh-9-shovel-68-x155cm.html